VetraCheck - NYC Building Inspection Services
Compliance
February 16, 2026
30 min read

NYC Building Owner's Parapet Inspection Checklist for 2026

A step-by-step parapet inspection checklist for NYC building owners in 2026. Pre-inspection prep, what to document, annual maintenance schedules, and how to keep your compliance records organized year-round.

NYC building owner's parapet inspection checklist - tools and documents on a rooftop

Local Law 126 requires annual parapet inspections for most NYC buildings. That much is straightforward. But the owners and managers who stay ahead of compliance year after year share one thing in common: they treat inspections as a repeatable process, not a last-minute scramble.

This checklist gives you that process. From the documents you should gather before your inspector arrives to the maintenance tasks that prevent costly findings, everything here is designed to make your 2026 parapet inspection as smooth and productive as possible.

If you need a full primer on the law itself, start with the complete guide to Local Law 126 parapet inspections. This article assumes you already understand the basics and need a practical roadmap for execution.

How to Use This Checklist

This guide is organized chronologically. It follows the timeline of a typical inspection year from start to finish:

Pre-inspection preparation

What to do before the inspector arrives

Day-of inspection readiness

Physical and logistical setup

Inspector documentation

Verify completeness of the work

Post-inspection action items

What to do with the report

Year-round maintenance

Monthly and seasonal tasks

Record-keeping system

Organize for long-term compliance

Print this out, bookmark it, or share it with your property manager. The goal is to make this the one resource you come back to every year.

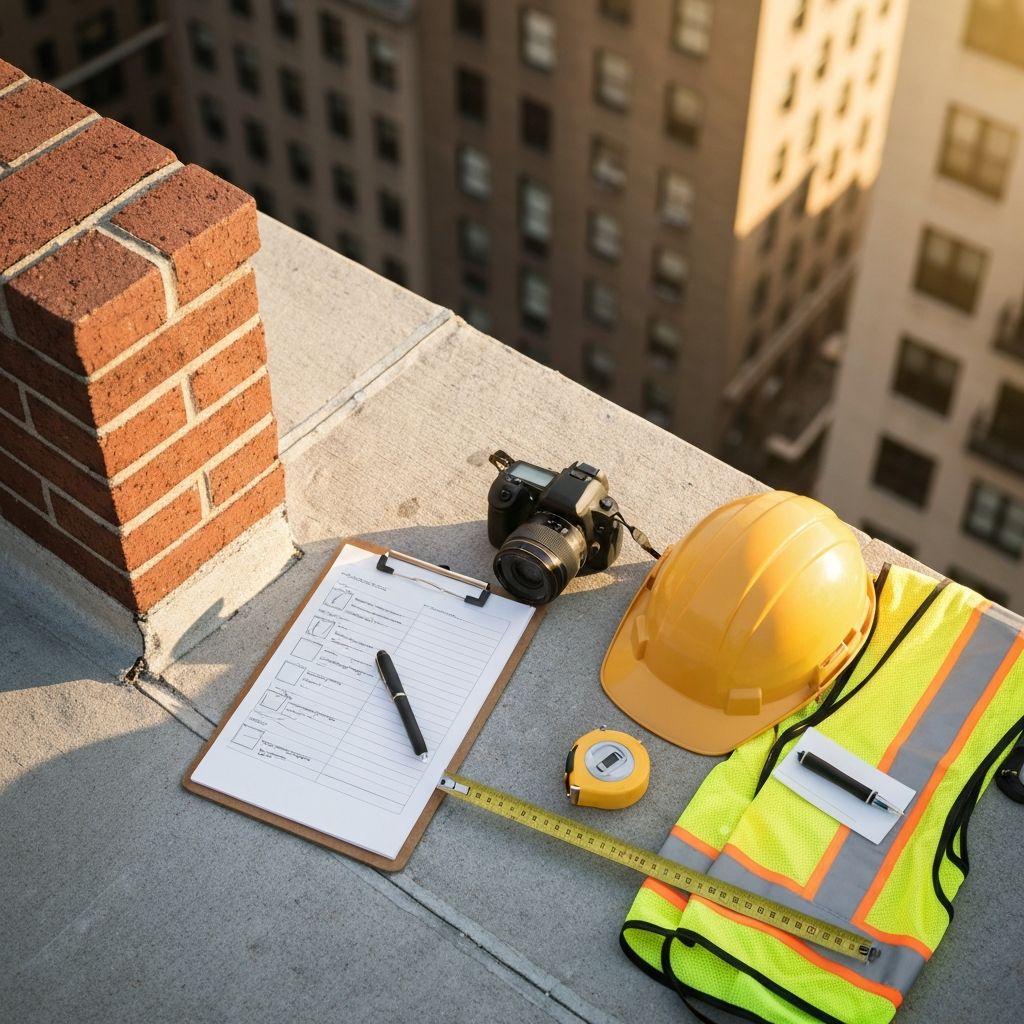
Part 1: Pre-Inspection Preparation Checklist

The work you do before your inspector sets foot on the roof directly affects the quality of the inspection and the usefulness of the report. These steps take 30 to 60 minutes but save hours of complications later.

Gather Your Documentation

Pull together these documents before scheduling your inspection:

Previous year's parapet inspection report (if this is not your first year)
Any FISP (Local Law 11) reports from the current or previous cycle
Records of any parapet or facade repairs completed since the last inspection
Photographs from previous inspections (for comparison)
Building DOB BIS records showing your building's BIN number and compliance history
Any open DOB violations related to the building exterior
Contact information for your building's superintendent or on-site manager
Roof access procedures and any security requirements

Why it matters: Having last year's report on hand is especially valuable. It gives the inspector a baseline to compare against. They can check whether previously noted conditions have changed, improved, or worsened. Without it, every inspection starts from scratch.

Verify Your Building's Requirements

Confirm these details about your specific building:

Is your building required to comply with Local Law 126? (Most buildings with parapets along public right-of-way are covered)
Is your building also subject to FISP? (Buildings taller than 6 stories with exterior walls)
If subject to both, does your current FISP cycle year align with 2026?
Are there any pending DOB enforcement actions or previous violations that the inspector should know about?

Understanding the overlap between LL126 and FISP is critical for buildings subject to both. The parapet inspection vs. FISP comparison explains exactly when one report can satisfy both requirements.

Schedule Strategically

Timing matters more than most owners realize.

Book your inspection for Q1 or Q2 (January through June). This gives you the full second half of the year to address any findings before the December 31 compliance deadline.
Avoid scheduling during or immediately after heavy rain, snowfall, or ice storms. Wet conditions make roof surfaces hazardous and can obscure parapet conditions.
Schedule for a weekday when your superintendent or building manager will be available to provide roof access.
If you manage multiple properties, batch inspections by neighborhood or borough to reduce scheduling complexity and potentially negotiate volume pricing.

Need help selecting an inspection company? The guide to choosing a parapet inspection company covers credentials, pricing, and questions to ask.

Prepare the Physical Space

Make your inspector's job easier (and the inspection more thorough) by prepping the site:

Confirm that roof access is available: keys, codes, elevator access to the top floor, and bulkhead or hatch entry
Clear any debris, equipment, or stored materials away from parapet walls on the roof level
Move any planters, furniture, or other items that are blocking parapet surfaces from being inspected visually
If your building has a setback level (a lower roof level created by the building stepping back), make sure that level is also accessible
Note any areas where access is restricted or difficult (locked sections, areas near mechanical equipment, sections reachable only by ladder)
If you know of specific problem areas from previous inspections or building complaints, flag those locations for the inspector

A clean, accessible roof means the inspector can cover every parapet section efficiently. Obstructed areas may require a follow-up visit, which adds cost and delays the report.

Notify Building Occupants

Depending on your building type and access requirements, you may need to let occupants know about the inspection:

Post a notice in common areas stating the date and approximate time of the inspection
If the inspector needs to access specific apartments or offices for interior observation of exterior conditions (rare, but possible), coordinate that access in advance
Let your superintendent or doorman know the inspector's name and expected arrival time
If the building has security protocols for contractors, make sure the inspector is on the approved access list

Part 2: Day-of Inspection Readiness

When the inspector arrives, you want the process to go smoothly. These items ensure there are no delays or incomplete observations.

Access and Logistics

Confirm the superintendent or designated contact is on-site and available
Have all keys, access cards, and security codes ready for roof, bulkhead, and any restricted areas
If the building has an elevator, coordinate its use so the inspector can reach the top floor without delays
Provide a clear path from the building entrance to the roof access point
If multiple roof levels exist (main roof, setback levels, mechanical room roofs), identify all of them for the inspector

Information to Have Ready

Building address(es) and BIN number
Building owner's name and contact information
Number of stories and approximate building dimensions
Known construction type and approximate year built
Location and type of any parapet appurtenances (copings, railings, satellite dishes, flagpoles, signage, mechanical equipment on or near parapets)
Last year's inspection report and classification
Details of any repairs completed since the last inspection, including contractor name, scope of work, and completion date

Safety Considerations

The inspector is responsible for their own safety on the roof, but you can help create a safer working environment:

Make sure all roof surfaces are dry and free of ice (reschedule if conditions are hazardous)
Ensure guardrails or fall protection systems at roof edges are intact
Point out any known hazards: uneven surfaces, loose pavers, temporary construction, or trip hazards near parapet walls
If any areas of the roof are structurally compromised, notify the inspector before they go up

Part 3: What Your Inspector Should Be Documenting

You are paying for a professional inspection and a detailed report. Knowing what a thorough inspection covers helps you evaluate whether you are getting what you paid for.

This section covers what to expect during the physical inspection. For a broader overview, see what to expect during a NYC DOB building inspection.

Physical Inspection Elements

A complete LL126 parapet inspection should cover every parapet section that faces or overhangs a public right-of-way. For each section, the inspector should be evaluating:

Overall structural condition of the parapet wall (plumb, leaning, bowing)
Mortar joint condition (cracking, erosion, missing mortar, depth of deterioration)
Brick or masonry unit condition (cracking, spalling, efflorescence, displacement)
Coping stone or cap condition (secure, loose, cracked, shifted, missing sections)
Through-wall flashing condition (visible, intact, deteriorated, or absent)
Metal flashing or counterflashing at parapet tops (condition, attachment, rust)
Waterproofing membrane or coating on the parapet interior face (if applicable)
Condition of any railings, fences, or guardrails mounted on or near the parapet
Condition of any signage, satellite dishes, flag brackets, or other appurtenances attached to the parapet
Evidence of water infiltration or damage (staining, biological growth, freeze-thaw damage)
Evidence of previous repairs (patches, rebuilt sections, replaced copings)
Any conditions that represent an immediate safety risk to pedestrians below

Documentation the Inspector Should Produce

The inspection report must include:

Building identification: address, block, lot, BIN, and building owner
Inspector's name, credentials, license number, and company name
Date of the inspection
A plan or diagram showing each parapet section inspected, keyed to the report's condition descriptions
Written description of each parapet section's construction (materials, approximate height and thickness)
Condition assessment for each section with specific descriptions of any deterioration observed
Classification for each section: Safe, SWARMP (Safe With a Repair and Maintenance Program), or Unsafe
Dated, labeled photographs for every section inspected, including close-ups of any damage
Specific repair recommendations for any conditions classified as SWARMP or Unsafe
Statement regarding whether conditions observed have changed from the previous inspection (if a prior report was available)

Important: If the report you receive is missing any of these elements, it may not meet LL126 requirements. A report that fails a DOB audit is the same as having no report at all.

Red Flags During the Inspection

Watch for these signs that the inspection may not be thorough enough:

The inspector spends less than 20 minutes on the roof for a multi-sided building
They only photograph one or two spots instead of documenting every parapet section
They do not bring measuring tools, a camera, or reference materials
They skip sections that are harder to access without explaining why
They do not ask about previous reports or repair history
They cannot explain the SWARMP or Unsafe classification criteria when asked

If you suspect your inspection was inadequate, learn about the signs your building may need immediate parapet repairs so you can spot problems yourself.

Part 4: Post-Inspection Action Items

The inspection itself is one step. What you do with the results determines whether you are truly compliant and protected.

When You Receive Your Report

Do these things within one week of getting the report:

Read the full report, not just the classification summary. Look at every photograph and read every condition description.
Confirm the report includes all required elements listed in Part 3.
Verify that all parapet sections facing public right-of-way are accounted for.
Note the classification for each section: Safe, SWARMP, or Unsafe.
If anything is unclear or seems incomplete, contact the inspector immediately for clarification.

If All Sections Are Classified as Safe

File the report in your building's compliance records (see Part 6 for the recommended filing system)
Save a backup copy digitally
Note the inspection date on your calendar for the following year
Continue with the year-round maintenance schedule in Part 5 to keep conditions safe going forward

If Any Section Is Classified as SWARMP

A SWARMP classification means the parapet is currently safe for public use but has conditions that need repair or ongoing monitoring to prevent further deterioration.

Review the specific repair recommendations in the report
Get repair quotes from qualified masonry contractors within 30 days of receiving the report
Schedule and complete repairs as recommended, ideally before the next inspection cycle
Document all repairs with dated photographs and contractor invoices
Provide repair documentation to your inspector at the next annual inspection
If the same section receives a SWARMP classification in consecutive years without improvement, expect the inspector to escalate it in the following year

SWARMP conditions can escalate to Unsafe if left unaddressed. The full breakdown of what happens after a failed inspection explains the timeline and costs involved.

If Any Section Is Classified as Unsafe

An Unsafe finding triggers an immediate compliance timeline:

Your inspector must notify the DOB within the same business day of the Unsafe finding
You must implement public protection (sidewalk shed, netting, or barricade) within 24 to 48 hours, depending on the severity
Repairs must be completed within 90 days of the Unsafe notification
A follow-up inspection must confirm the repairs have resolved the condition
Contact your insurance carrier to report the condition and protective measures taken
Engage a qualified contractor immediately. Do not wait for multiple bids if the condition is genuinely hazardous.

For the complete Unsafe timeline and step-by-step recovery process, see what happens if you fail a parapet inspection.

Part 5: Year-Round Parapet Maintenance Schedule

Annual inspections catch problems. Year-round maintenance prevents them. This schedule covers the key tasks by season to keep your parapets in the best possible condition between inspections.

January & February: Winter Damage Watch

After any significant snowfall or ice storm, visually check parapet tops from the roof for ice buildup, especially at coping joints
Look for icicle formation hanging from parapet edges over sidewalks (report immediately if found)
Clear snow accumulation away from parapet bases on the roof to reduce moisture contact
Document any visible cracking or movement in mortar joints (freeze-thaw cycles cause the most damage during these months)
Check that temporary winter protections (tarps, sealants applied in fall) are still intact

March & April: Post-Winter Assessment

Conduct a visual walk-around of the building exterior from street level. Look for new cracks, displaced masonry, or efflorescence staining on parapet walls.
On the roof, check copings and cap stones for any shifting caused by ice expansion
Inspect mortar joints for new deterioration. Winter freeze-thaw cycles are the primary cause of mortar erosion in NYC.
Clear any debris (branches, leaves, construction material) that accumulated against parapet walls during winter
Schedule your annual LL126 inspection if you have not already. Q2 is ideal timing.

Look for the warning signs outlined in 5 signs your building may need immediate parapet repairs.

May & June: Inspection Season and Repairs

Complete your annual parapet inspection (if scheduled for Q2)
Review the inspection report thoroughly within one week of receiving it
If repairs are recommended, get contractor quotes and schedule work during the summer months when weather is most favorable for masonry work
Check drainage at the roof level. Make sure scuppers, drains, and gutters near parapets are clear. Pooling water at parapet bases accelerates deterioration.
Inspect any sealant or caulking at coping joints and flashings. UV exposure starts to degrade these materials during the warmer months.

July & August: Peak Repair Season

This is the best window for any masonry repair work. Mortar and sealants cure best in warm, dry conditions.
Complete any repair work recommended in the inspection report
Document all repairs with dated photos, contractor information, and descriptions of work performed
If repointing was done, monitor the new mortar during curing to confirm it is setting properly
Check metal flashings and counterflashings for heat expansion damage or loosened fasteners

September & October: Pre-Winter Preparation

Conduct a final visual check of all parapet surfaces before winter
Apply waterproofing sealant to any exposed mortar joints or porous masonry if recommended by your inspector (sealants need dry conditions and temperatures above 40°F to cure)
Clear roof drains and scuppers of leaves and debris to prevent water pooling against parapets during fall rains
Check that all coping stones and cap flashings are secure before freeze-thaw cycles begin
If any repair work was deferred from earlier in the year, complete it now. Work becomes much more difficult and expensive once temperatures drop.

Water infiltration through parapets causes some of the most expensive damage in NYC buildings. The guide to preventing water infiltration covers protective strategies.

November & December: Year-End Compliance

If you have not completed your annual inspection yet, schedule it immediately. The December 31 deadline is firm.
Verify that all inspection reports are filed and accessible in your compliance records
Confirm that any required repairs from the inspection have been completed and documented
If any conditions were classified as SWARMP, verify that the maintenance program described in the report is being followed
Review your compliance status for all building inspection requirements (not just parapets) before year end
Set calendar reminders for Q1 of the following year to begin the next inspection cycle

Part 6: Record-Keeping System

Good records are your best defense in a DOB audit, a liability dispute, or an insurance claim. They also make every future inspection faster and more useful because the inspector can track conditions over time.

What to Keep

Maintain a dedicated parapet compliance file (physical and digital) containing:

Every annual inspection report since the building's first LL126 inspection
All photographs from every inspection (stored by date)
FISP reports (if the building is subject to Local Law 11)
Records of every repair: date, contractor, scope of work, cost, before-and-after photographs, and contractor invoices/receipts
Correspondence with DOB related to parapet or facade compliance
Any DOB violation notices and their resolution documentation
Certificates of insurance for inspection companies and repair contractors
Written quotes and contracts for inspection and repair services

How to Organize It

Use this folder structure (digital or physical):

[Building Address] / Parapet Compliance

Reports / [Year] -- annual inspection reports

Photos / [Year] -- inspection and repair photographs

Repairs / [Year] -- contractor quotes, invoices, before/after docs

FISP / [Cycle Year] -- FISP reports, if applicable

Correspondence / DOB -- official correspondence, violations

Insurance -- certificates from inspectors and contractors

Reference -- LL126 text, checklists, contact list

How Long to Retain Records

Keep parapet inspection records indefinitely. There is no statutory limit on how far back the DOB can look when reviewing compliance history. In a liability case, the entire history of inspections and maintenance becomes relevant. At minimum, retain all records for at least 7 years, which aligns with general NYC record retention guidance and covers the full FISP cycle. But the best practice is to keep everything, especially in a digital format where storage costs nothing.

Digital vs. Paper Records

Digital records are strongly recommended:

They are searchable. Finding a specific report or photo from three years ago takes seconds instead of hours.
They are shareable. You can email records to your inspector, attorney, insurance company, or DOB without mailing physical copies.
They are backed up. Cloud storage means a flood, fire, or office move does not destroy your compliance history.
They are time-stamped. Digital files carry creation and modification metadata that adds a layer of verification.

If you receive paper reports from your inspector, scan them immediately and file both the physical and digital versions. Going forward, request digital deliverables (PDF reports, high-resolution photos) as standard.

Common Mistakes Building Owners Make

After working with hundreds of NYC buildings, these are the patterns that cause the most problems:

Waiting until Q4 to schedule inspections.

By October, every inspection company in NYC is booked solid. You end up overpaying for rush service or missing the deadline entirely. Book in Q1 for a Q2 inspection. Every year.

Not keeping previous reports.

If your inspector cannot compare this year's conditions to last year's, they are working blind. Year-over-year comparison is how emerging problems get caught early, before they become Unsafe findings.

Ignoring SWARMP classifications.

SWARMP does not mean "fine for now." It means "safe today, but deteriorating." Building owners who ignore SWARMP recommendations for consecutive years often end up with Unsafe findings, sidewalk sheds, and repair costs that are three to five times what they would have spent addressing the issue when it was first flagged.

Treating the inspection as a one-day event.

The inspection is one piece of a year-round process. Without ongoing maintenance and monitoring, you are just documenting a building that is slowly falling apart instead of actively preventing deterioration.

Not documenting repairs.

You spent $15,000 repointing a parapet wall, but you have no before-and-after photos, no contractor invoice on file, and no record of what was done. That undermines the value of the repair and the inspection.

Storing records in only one location.

A single filing cabinet or a single hard drive is a single point of failure. Keep copies in at least two places: one physical, one cloud-based.

Using a different inspector every year without transferring history.

If you switch companies, provide the new inspector with copies of all previous reports. Continuity matters. Without it, patterns get missed.

Special Considerations for Multi-Building Portfolios

Property managers and building owners with multiple buildings face unique challenges that a single-building checklist does not fully address.

Create a Portfolio-Wide Compliance Calendar

LL126 parapet inspection dates
FISP filing deadlines (for buildings over 6 stories)
Any open repair deadlines from previous inspections
Contract renewal dates for inspection companies

Standardize Your Process

Use the same inspection company across all properties
Use the same report format and record-keeping structure
Compare conditions across your portfolio
Spot systemic issues by construction type or age

Assign Accountability

Designate one person per building for compliance
Scheduling the annual inspection
Reviewing the report and flagging findings
Tracking open repair items to completion

Budget for Compliance as a Line Item

Include parapet inspections in annual operating budget
Budget a maintenance reserve for repairs (15-25% of inspection costs)
Smooth out financial impact year over year
Use cost ranges from the pricing guide for budgeting

The cost guide for parapet inspections provides ranges you can use for budgeting by building size.

Quick-Reference Summary: The Complete Checklist

Here is the full checklist in condensed form. Use this as your go-to reference each year.

Pre-Inspection (Q1)
Gather previous inspection reports, FISP reports, and repair records
Verify building requirements (LL126, FISP, or both)
Schedule inspection for Q1 or Q2
Select/confirm inspection company
One Week Before Inspection
Confirm roof access logistics with superintendent
Clear parapet areas on the roof of debris and obstructions
Prepare building information packet for the inspector
Notify building occupants if needed
Day of Inspection
Confirm superintendent is on-site with access keys/codes
Provide previous reports and repair history to inspector
Identify all roof levels and parapet sections
Flag known problem areas
Within One Week of Report
Read the full report and review all photographs
Verify all sections and required elements are included
Note classifications and repair recommendations
Begin getting repair quotes if SWARMP or Unsafe findings
Post-Inspection (Ongoing)
File report in compliance records
Schedule and complete any recommended repairs
Document all repairs with photos and invoices
Follow monthly/seasonal maintenance schedule
Set reminder for next year's inspection

Frequently Asked Questions

Do I need a separate checklist for FISP compliance?

FISP (Local Law 11) has its own requirements that go beyond parapets to cover the entire building facade. However, in years where your FISP cycle and LL126 overlap, a single comprehensive inspection can cover both. This checklist focuses on LL126, but many of the principles (documentation, scheduling, record-keeping) apply to FISP as well.

How long does a typical parapet inspection take?

For a standard-sized building (6 to 12 stories, four-sided), a thorough inspection takes 45 minutes to 2 hours on site, depending on the number of parapet sections, access complexity, and extent of findings. Smaller buildings may take 20 to 30 minutes. Larger or more complex buildings can take a full half day.

What if I just bought a building and have no previous inspection history?

Start fresh. Schedule an inspection as soon as possible and let the inspector know there are no prior reports available. They will establish a complete baseline. Going forward, you will have a starting point for year-over-year comparisons. Also check DOB BIS records for any past filings or violations related to the building exterior.

Can my superintendent do the inspection instead of hiring a company?

Local Law 126 allows building superintendents to perform parapet inspections. However, the report must still meet all documentation requirements, and a superintendent may not have the technical background to identify structural issues or produce a DOB-defensible report. For most buildings, hiring a qualified inspection company with licensed professionals is the safer choice.

Is there a specific form I need to use for LL126 reporting?

The DOB has specific requirements for what the report must contain, but as of 2026 there is not a single mandatory form. The report must include all required elements (property identification, inspector credentials, dated photos, classifications, repair recommendations, etc.). Most professional inspection companies use their own report template that meets these requirements.

What if my building had Safe findings last year? Do I still need to do the maintenance tasks?

Absolutely. A Safe classification means the parapet was in acceptable condition at the time of inspection. It does not mean maintenance is unnecessary. Year-round upkeep is what keeps the classification Safe from one year to the next. Buildings that skip maintenance between inspections are the ones that see conditions degrade from Safe to SWARMP.

How should I handle parapet maintenance for a co-op or condo board?

The board should designate a building committee member or the managing agent as the compliance coordinator. Inspection reports should be shared with the board and included in board meeting minutes. Budget for inspections and a maintenance reserve as part of the annual operating budget. Keep all records accessible in a shared digital location that multiple board members and the managing agent can access.

Your 2026 Action Plan

If you take one thing from this checklist, let it be this: parapet compliance is a year-round process, not a once-a-year event. The building owners who do this well treat it like any other operating responsibility. They schedule early, document everything, address findings promptly, and build institutional knowledge that compounds over time.

The checklist above is your blueprint. Adapt it to your specific building, share it with your property manager and superintendent, and revisit it at the start of every year.

Start by scheduling your 2026 inspection if you have not already. The earlier in the year you get it done, the more time you have to address anything the inspector finds.

Schedule Your 2026 Parapet Inspection

VetraCheck provides comprehensive Local Law 126 parapet inspections across all five NYC boroughs. Licensed engineers, detailed reports, and full compliance support.

Related Articles

Regulations

Local Law 126 Parapet Inspections: The Complete NYC Guide for 2026

Everything you need to know about Local Law 126 requirements, deadlines, who can inspect, report rules, and compliance.

Compliance

What Happens If You Fail a Parapet Inspection in NYC?

Your parapet was classified as Unsafe or SWARMP. Here is exactly what happens next and how to get back to compliance.

Pricing

How Much Does a Parapet Inspection Cost in NYC?

What NYC building owners actually pay for Local Law 126 parapet inspections in 2026. Cost ranges by building size and what affects pricing.